Библиотека сайта rus-linux.net
Установка LEMP-сервера (Nginx с MariaDB и PHP) в CentOS 6
Оригинал: Install LEMP Server (Nginx with MariaDB and PHP) on CentOS 6Автор: Senthilkumar
Дата публикации: 1 июля 2013 года
Перевод: А. Кривошей
Дата перевода: июль 2013 г.
LEMP - это комбинация операционной системы и набора программного обеспечения с открытым исходным кодом. Акроним LEMP образован из первых букв Linux, Nginx HTTP Server, базы данных MySQL и PHP, Perl или Python. В этом руководстве описывается установка LEMP в RHEL/CentOS/Scientific Linux 6.x с системой управления базами данных MariaDB вместо MySQL.
Имя хоста и IP-адрес моей тестовой машины server.unixmen.com и 192.168.1.200/24 соответственно.
Установка Nginx
Nginx (произносится как engine-x) - это бесплатный HTTP и прокси-сервер с открытым исходным кодом, написанный Игорем Сысоевым. Согласно данным netcraft 14,08% веб-сайтов работают на Nginx.
В официальных репозиториях CentOS нет nginx, поэтому сначала необходимо установить репозиторий EPEL.
[root@server ~]# rpm -ivh http://dl.fedoraproject.org/pub/epel/6/i386/epel-release-6-8.noarch.rpm
Теперь установите Nginx с помощью следующей команды:
[root@server ~]# yum install nginx -y
Запустите Nginx и настройте его автоматический запуск при каждой загрузке системы:
[root@server ~]# /etc/init.d/nginx start
Starting nginx: [ OK ]
[root@server ~]# chkconfig nginx on
Остановите Apache или любой другой веб-сервер, если они у вас установлены.
[root@server ~]# /etc/init.d/httpd stop
[root@server ~]# chkconfig httpd off
Если вы хотите предоставить доступ к серверу с других машин, откройте для nginx порт 80.
[root@server ~]# vi /etc/sysconfig/iptables
[...]
-A INPUT -p udp -m state --state NEW --dport 80 -j ACCEPT
-A INPUT -p tcp -m state --state NEW --dport 80 -j ACCEPT
[...]
Перезапустите iptables:
[root@server ~]# /etc/init.d/iptables restart
Теперь в браузере откройте адрес "http://192.168.1.200". Должна открыться тестовая страница nginx.

Настройка Nginx
Откройте файл /etc/nginx/nginx.conf и установите значение параметра worker_processes (то есть количество процессоров в вашей системе). Чтобы узнать количество процессоров, воспользуйтесь командой "lscpu". В моем случае это 1.
[root@server ~]# vi /etc/nginx/nginx.conf
worker_processes 1;
Сохраните и закройте файл. Откройте "/etc/nginx/conf.d/default.conf" и отредактируйте его, как показано ниже.
[root@server ~]# vi /etc/nginx/conf.d/default.conf
#
# The default server
#
server {
    listen       80;
    server_name  server.unixmen.com;

    #charset koi8-r;

    #access_log  logs/host.access.log  main;

    location / {
        root   /usr/share/nginx/html;
        index  index.html index.htm;
    }

    error_page  404              /404.html;
    location = /404.html {
        root   /usr/share/nginx/html;
    }

    # redirect server error pages to the static page /50x.html
    #
    error_page   500 502 503 504  /50x.html;
    location = /50x.html {
        root   /usr/share/nginx/html;
    }

    # proxy the PHP scripts to Apache listening on 127.0.0.1:80
    #
    #location ~ \.php$ {
    #    proxy_pass   http://127.0.0.1;
    #}

    # pass the PHP scripts to FastCGI server listening on 127.0.0.1:9000
    ## Uncomment or Add the following lines
    location ~ \.php$ {
        root           html;
        fastcgi_pass   127.0.0.1:9000;
        fastcgi_index  index.php;
        fastcgi_param  SCRIPT_FILENAME  $document_root$fastcgi_script_name;
        include        fastcgi_params;
    }

    # deny access to .htaccess files, if Apache's document root
    # concurs with nginx's one
    #
    #location ~ /\.ht {
    #    deny  all;
    #}
}
Сохраните и закройте файл. Перезапустите службу nginx.
[root@server ~]# /etc/init.d/nginx restart
Установка MariaDB
MariaDB - это замена MySQL. Она представляет собой надежный и масштабируемый SQL-сервер с богатым набором расширений.
Для начала вы должны удалить все пакеты MySQL, если они у вас установлены:
[root@server ~]# yum remove mysql* mysql-server mysql-devel mysql-libs
Установите репозиторий REMI, чтобы решить проблему совместимости с MySQL, иначе при попытке установки MariaDB вы, скорее всего, увидите сообщения об ошибках с зависимостями.
[root@server ~]# rpm -ivh http://rpms.famillecollet.com/enterprise/remi-release-6.rpm
Теперь установите пакет compat-mysql55:
[root@server ~]# yum --enablerepo=remi-test --disablerepo=remi install compat-mysql55
Создайте файл репозитория для MariaDB, и добавьте в него следующие строки:
Для 32-битных систем:
[root@server ~]# vi /etc/yum.repos.d/mariadb.repo
# MariaDB 5.5 CentOS repository list - created 2013-06-06 07:42 UTC
# http://mariadb.org/mariadb/repositories/
[mariadb]
name = MariaDB
baseurl = http://yum.mariadb.org/5.5/centos6-x86
gpgkey=https://yum.mariadb.org/RPM-GPG-KEY-MariaDB
gpgcheck=1
Для 64-битных систем:
[root@server ~]# vi /etc/yum.repos.d/mariadb.repo
# MariaDB 5.5 CentOS repository list - created 2013-06-06 07:53 UTC
# http://mariadb.org/mariadb/repositories/
[mariadb]
name = MariaDB
baseurl = http://yum.mariadb.org/5.5/centos6-amd64
gpgkey=https://yum.mariadb.org/RPM-GPG-KEY-MariaDB
gpgcheck=1
Сохраните и закройте файл, после чего запустите yum update:
[root@server ~]# yum update
Теперь установите MariaDB:
[root@server ~]# yum install MariaDB-devel MariaDB-client MariaDB-server -y
Запустите службу MariaDB и настройте ее автоматический запуск при каждой загрузке:
[root@server ~]# /etc/init.d/mysql start
Starting MySQL... SUCCESS!
[root@server ~]# chkconfig mysql on
Set MySQL root password
По умолчанию пароль root в MySQL пустой. Поэтому, чтобы предотвратить несанкционированный доступ к MySQL, установите пароль root:
[root@server ~]# /usr/bin/mysql_secure_installation
/usr/bin/mysql_secure_installation: line 379: find_mysql_client: command not found

NOTE: RUNNING ALL PARTS OF THIS SCRIPT IS RECOMMENDED FOR ALL MariaDB
      SERVERS IN PRODUCTION USE!  PLEASE READ EACH STEP CAREFULLY!

In order to log into MariaDB to secure it, we'll need the current
password for the root user.  If you've just installed MariaDB, and
you haven't set the root password yet, the password will be blank,
so you should just press enter here.

Enter current password for root (enter for none):
OK, successfully used password, moving on...

Setting the root password ensures that nobody can log into the MariaDB
root user without the proper authorisation.

You already have a root password set, so you can safely answer 'n'.

Change the root password? [Y/n] y
New password:
Re-enter new password:
Password updated successfully!
Reloading privilege tables..
 ... Success!

By default, a MariaDB installation has an anonymous user, allowing anyone
to log into MariaDB without having to have a user account created for
them.  This is intended only for testing, and to make the installation
go a bit smoother.  You should remove them before moving into a
production environment.

Remove anonymous users? [Y/n]
 ... Success!

Normally, root should only be allowed to connect from 'localhost'.  This
ensures that someone cannot guess at the root password from the network.

Disallow root login remotely? [Y/n]
 ... Success!

By default, MariaDB comes with a database named 'test' that anyone can
access.  This is also intended only for testing, and should be removed
before moving into a production environment.

Remove test database and access to it? [Y/n]
 - Dropping test database...
ERROR 1008 (HY000) at line 1: Can't drop database 'test'; database doesn't exist
 ... Failed!  Not critical, keep moving...
 - Removing privileges on test database...
 ... Success!

Reloading the privilege tables will ensure that all changes made so far
will take effect immediately.

Reload privilege tables now? [Y/n]
 ... Success!

Cleaning up...

All done!  If you've completed all of the above steps, your MariaDB
installation should now be secure.

Thanks for using MariaDB!
Установка PHP
PHP (рекурсивный акроним для PHP: Hypertext Preprocessor) - это широко используемый скриптовый язык программирования общего назначения, который был разработан специально для веб-разработки, и может встраиваться в HTML.
Установите PHP с помощью следующей команды:
[root@server ~]# yum install php php-common php-fpm php-mysql -y
Запустите службу php-fpm и настройте ее автоматический запуск при каждой загрузке:
[root@server ~]# /etc/init.d/php-fpm start
[root@server ~]# chkconfig php-fpm on
Настройка PHP
Откройте в текстовом редакторе /etc/php.ini. Найдите строку cgi.fix_pathinfo и измените значение с 1 на 0 (ноль).
[root@server ~]# vi /etc/php.ini
[...]
; http://www.php.net/manual/en/ini.core.php#ini.cgi.fix-pathinfo
cgi.fix_pathinfo=0
[...]
Откройте файл /etc/php-fpm.d/www.conf и измените значения user и group с apache на nginx.
[root@server ~]# vi /etc/php-fpm.d/www.conf
[...]
; Unix user/group of processes
; Note: The user is mandatory. If the group is not set, the default user's group
;       will be used.
; RPM: apache Choosed to be able to access some dir as httpd
user = nginx
; RPM: Keep a group allowed to write in log dir.
group = nginx
[...]
Сохраните и закройте файл. Перезапустите службу php-fpm.
[root@server ~]# /etc/init.d/php-fpm restart
Тест PHP
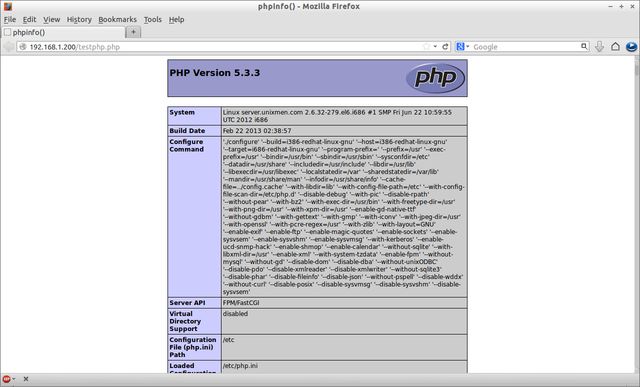
Создайте простой файл "testphp.php" в корневой директории Apache и добавьте в него строки, как показано ниже:
[root@server ~]# vi /usr/share/nginx/html/testphp.php
<?php
phpinfo();
?>
Сохраните и закройте файл. Перезапустите службу nginx:
[root@server ~]# /etc/init.d/nginx restart
Перейдите в браузере по адресу http://server-ip-address/testphp.php. Вы должны увидеть страницу с подробной информацией об установленной версии php.
Если вы хотите установить модули php, введите команду yum install php* и перезапустите службу nginx. Для верификации модулей откройте веб-браузер и перейдите по адресу http://server-ip-address/testphp.php. Вы увидите список всех установленных модулей php.
Это все. Теперь LEMP-сервер готов к использованию.